
What are the Benefits of ORCID?
There are many benefits to creating an ORCID and managing your profile, including:
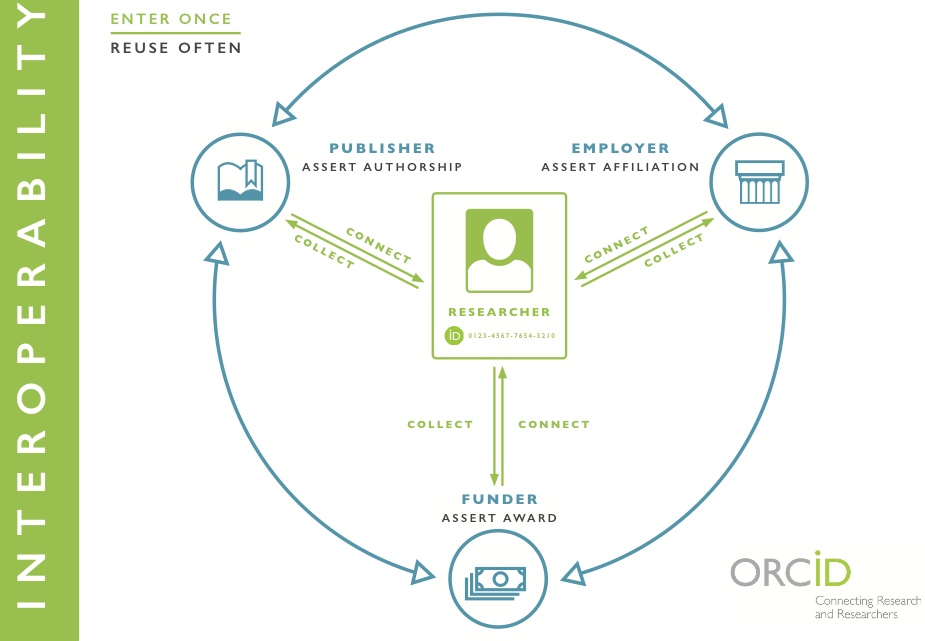
ORCID integrates with a variety of systems including publisher, repository (figshare), and funder (SciENcv). By creating an ORCID and maintaining your record, you can save the time and energy of entering your publication and award history into each system and instead use your ORCID to populate this information on your behalf.
Watch this 2 minute video for step by step instructions on signing up for your ORCID.
(For Step by Step Instructions scroll down.)
Register for Your ORCID iD from ORCID on Vimeo.
Need help managing your profile? Add a trusted individual to help with profile management. Everything from initial upload to updating can be assigned to another member of your team.
Add a Trusted Individual to Your ORCID Record from ORCID on Vimeo.
How do I sign up for ORCID?

There are 3 visibility settings: everyone, trusted parties, only me.

Information marked as everyone can be viewed by anyone who comes to the orcid.org website or consumed by anyone using the ORCID public API.

Limited-access information that can be seen by trusted parties whom you give explicit access to your ORCID record.

Private information can only be seen by you and trusted individuals you have granted access to help administer your ORCID record on your behalf.
For more information on visibility settings, read this article.
If one or more records with an identical name already exist in our system, you will be shown a list and prompted to check that none of them are yours.
What is ORCID?
ORCID, which stands for Open Researcher and Contributor ID, is a free, unique, persistent identifier (PID) for individuals to use as they engage in research, scholarship, and innovation activities.
People use “ORCID” or “ORCID ID” interchangeably, but what they’re talking about is a 16-digit number and the associated record (sometimes called a profile) that stores automatic links to all your research, and links all your research to you. By allowing trusted organizations to add your research information to your ORCID record, you can spend more time conducting your research and less time managing it.
What is ORCID? from ORCID on Vimeo.
What are my options for adding information about funding to ORCID?
Add information about grants, awards, or other types of funding that you have received to support your research.
Similar to adding your published works, so you have 2 options to add funding information to your profile:
1.) Search & Link - Use the DimensionWizard to import your grant information (preferred).
2.) Manually - Use if your grants are not listed through the DimensionWizard.
Option 1.) Search & Link
You can use the DimensionsWizard to import funding information into your profile.
Under Funding, go to Add Funding, then Search & Link, and select DimensionsWizard.

Grant DimensionsWizard authorization.
You'll be taken to the Dimensions website, where you can search for grants you have received and link them to your ORCID profile.
Option 2.) Manually Add
You can also add funding information manually.
Under Funding, go to Add Funding, then Add Manually.

Complete the form with all relevant information.
There are a number of ways to add your research to your ORCID record.
Select each of the tabs to find step by step instructions for adding work to your profile.

Easily import your publications and other research output to your ORCID record.
Under the Works header, click Add Works, then Search & Link, and select a tool to import your works automatically or add them by hand. You'll be prompted to grant access to your ORCID record then taken to the member's website to select the works to add to your ORCID record.
While it is possible to add works manually, we recommend that you permit trusted organizations to add/update this information to add and update them for you--look for the green ID icon next time you submit a paper, book chapter, or book (learn more about auto-updates).
Here are list supported Search & Link wizards that allow for bulk loading of your research:
To import citations from any of these sources, choose one and you will launch a search on your name as author. A wizard will prompt you to select your citations and associate them with your ORCID profile. For Scopus and Web of Science, you will ultimately be assigned a Scopus Author ID or Researcher ID (if you do not already have one) and these identifiers will be associated with your ORCID. While importing from these sources, you can select if your ORCID profile will be automatically updated, adding citations to your ORCID profile when you publish.
If you have a Google Scholar profile, or other list of publications, that is already populated, you can use this to populate your ORCID profile.
Begin by navigating to your Google Scholar profile. Select the publications you would like to add to your ORCID profile, then select EXPORT >> BibTeX.

Formatting your BibTeX:
Next, navigate to your ORCID profile. Select ADD WORKS>>Import BibTex. Select the .bib file and complete the import.


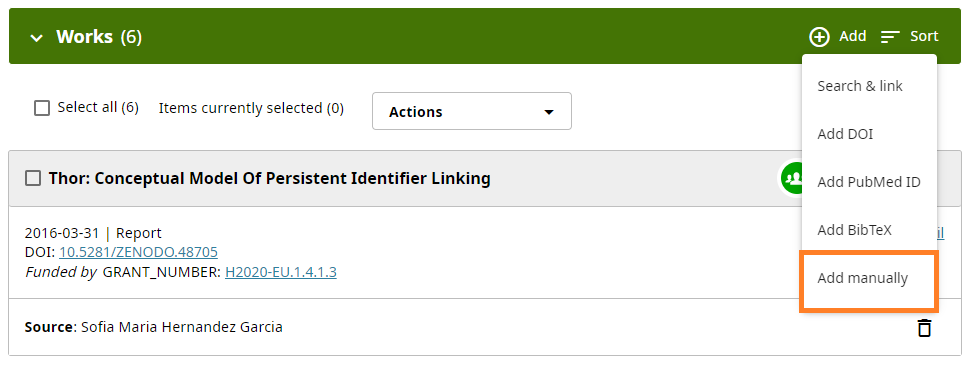
To add a work manually, start from the Works header, click +Add, then Add manually, and a box will appear enabling you to complete a manual work citation. See our works metadata article for a description of all the fields.
We recommend completing the Work identifiers field and as many other fields as possible when adding a work. The work identifier can be a DOI, ISBN, URL, ARK, or other resolvable identifier. When you enter an identifier, the system will check the identifier's source to see whether it is valid. If it is not valid, you will receive an error message. You can still save a work even if an error message is displayed.
**You can add a trusted individual to help with manual input of your works.**
Add information about grants, awards, or other types of funding that you have received to support your research.
Similar to adding your published works, so you 2 options to adding funding information to your profile:
Under Funding, go to Add Funding, then Search & Link, and select DimensionsWizard.

Grant DimensionsWizard authorization.
You'll be taken to the Dimensions website, where you can search for grants you have received and link them to your ORCID profile.
You can also add funding information manually.
Under Funding, go to Add Funding, then Add Manually.

Complete the form with all relevant information.

**You can add a trusted individual to help with manual input of your works.**
